There is a quiet pleasure in a homemade loaf that no shop-bought bread quite matches, and sourdough is the most self-sufficient version of all. It asks for nothing but flour, water and salt, plus the living starter you keep on the side. This guide walks you through one loaf from morning feed to evening bake, in metric, with the timings adjusted for the cooler kitchens most of us actually bake in.
This is a method guide, so it assumes your starter is already alive and bubbling. If you are still getting one going, begin with our sourdough starter guide and come back once it is active.
What makes it sourdough and not just bread?
Sourdough is bread raised by a live starter culture rather than commercial yeast. The Real Bread Campaign is precise about this: genuine sourdough is "made using only a live sourdough starter culture, without any other raising agent", and it "does not involve the use of baker's yeast, chemical raising agents" or additives (Real Bread Campaign). Your starter is a community of wild yeasts and lactic acid bacteria that were naturally present on the grain. The yeasts produce the gas that lifts the loaf, and the bacteria produce the acids that give sourdough its flavour, keeping quality and gentle tang.
That is the whole trick. No sachet of yeast, no bread improver, just time and a healthy culture doing the work.
What you need for one loaf
A single loaf keeps the maths simple. These quantities sit comfortably in line with UK millers' own recipes: Shipton Mill's classic white loaf uses 500g flour, 350g water, 100g starter and 10g salt (Shipton Mill).
| Ingredient | Amount | Notes |
|---|---|---|
| Strong white bread flour | 500g | The higher protein builds structure. A UK brand like Doves Farm or Shipton Mill is ideal. |
| Water, tepid (about 30°C) | 350g | Weigh it; 1ml water weighs 1g. UK tap water is fine. |
| Active sourdough starter | 100g | Bubbly, recently fed and at its peak. |
| Fine sea salt | 10g | Adds flavour and firms the dough. Do not leave it out. |
That 350g of water in 500g of flour works out at 70% hydration, which is forgiving enough for a first few loaves while still giving an open crumb. You will also want digital scales, a large mixing bowl, a proving basket (a banneton) or a bowl lined with a floured tea towel, and a lidded cast-iron casserole to bake in.
How do you know your starter is ready?
Feed your starter several hours before you plan to mix, using a rough one part starter, one part water, one part flour by weight. It is ready to bake with when it has roughly doubled, looks domed and bubbly on top, and smells pleasantly yeasty and a little sour rather than sharp like nail varnish.
The classic test is to drop a teaspoon of it into a glass of water. If it floats, the culture is full of gas and ready to go. If it sinks, give it another hour or two, or feed it again. A sluggish starter is the single most common reason a loaf turns out flat and dense, so it is worth waiting for.
A tired starter cannot lift a loaf, so the patience you spend here is repaid in every slice.
The method, step by step
- 1
Autolyse
Weigh the flour and water into your bowl and mix with a spoon or your hand until no dry flour remains. Cover and leave for 30 to 60 minutes. This rest, called the autolyse, lets the flour hydrate and start forming gluten before you even begin, giving a smoother, more extensible dough with less effort.
- 2
Mix in the starter and salt
Add the 100g of active starter and the 10g of salt. Squeeze and fold the dough in the bowl until both are fully worked through and it comes together into a shaggy, slightly sticky ball. Wet your hand if it clings. Cover the bowl.
- 3
Bulk fermentation with stretch-and-folds
Leave the dough somewhere reasonably warm to rise. Over the first two to three hours, give it a set of stretch-and-folds every 30 to 45 minutes: wet one hand, grab a side of the dough, stretch it up and fold it over to the middle, then turn the bowl a quarter and repeat until you have gone all the way round. Three or four sets is plenty. Each set builds strength and you will feel the dough grow smoother and tauter.
- 4
Judge the rise, then shape
When bulk is done (see below), tip the dough onto a lightly floured worktop. Fold the edges into the centre to make a rough ball, then drag it towards you a few times with cupped hands to build surface tension. Rest it seam-side down for 10 minutes, then shape once more into a tight round.
- 5
Into the basket and the fridge
Flour your banneton or tea-towel-lined bowl well and place the dough in seam-side up. Cover and put it straight into the fridge for a cold overnight proof of 12 to 18 hours. No need to leave it out at room temperature first in a cool UK kitchen.
- 6
Score and bake
Preheat the oven with the empty Dutch oven inside. Turn the cold dough out onto parchment, score it, lower it into the hot pot, bake with the lid on to trap steam, then remove the lid to colour and crisp the crust. Full temperatures are below.
How do you know when bulk fermentation is done?
This is the part that trips up beginners, because the answer is not a number of hours. Bulk fermentation is finished when the dough has risen by roughly a third to a half, looks puffy and domed, shows a few bubbles at the surface and edges, and wobbles like a set jelly when you shake the bowl. Poke it gently and the dent should spring back slowly rather than instantly.
Time is only a guide. Doves Farm's own recipe leans on a warm spot of about 24°C for the bulk, achieved by using the oven with just the light on (Doves Farm). Most home kitchens are cooler than that.
Why the cold overnight proof in the fridge?
Putting the shaped dough in the fridge does two jobs at once. The cold slows the yeast right down so the loaf proves gently overnight without over-proving, which fits neatly around a working day: shape in the evening, bake in the morning. It also lets the bacteria carry on quietly building flavour, so a fridge-proved loaf tastes deeper and more complex.
There is a practical bonus too. Cold dough is firm dough, and firm dough is far easier to turn out, score cleanly and lift into a screaming-hot pot without it spreading into a puddle. UK millers use this overnight fridge prove for exactly these reasons.
Scoring and baking in a Dutch oven
Half an hour before baking, put your empty lidded casserole into the oven and heat it to 230°C (fan ovens run hotter, so 210°C fan is about right). You want the pot properly hot so the loaf hits an instant blast of heat.
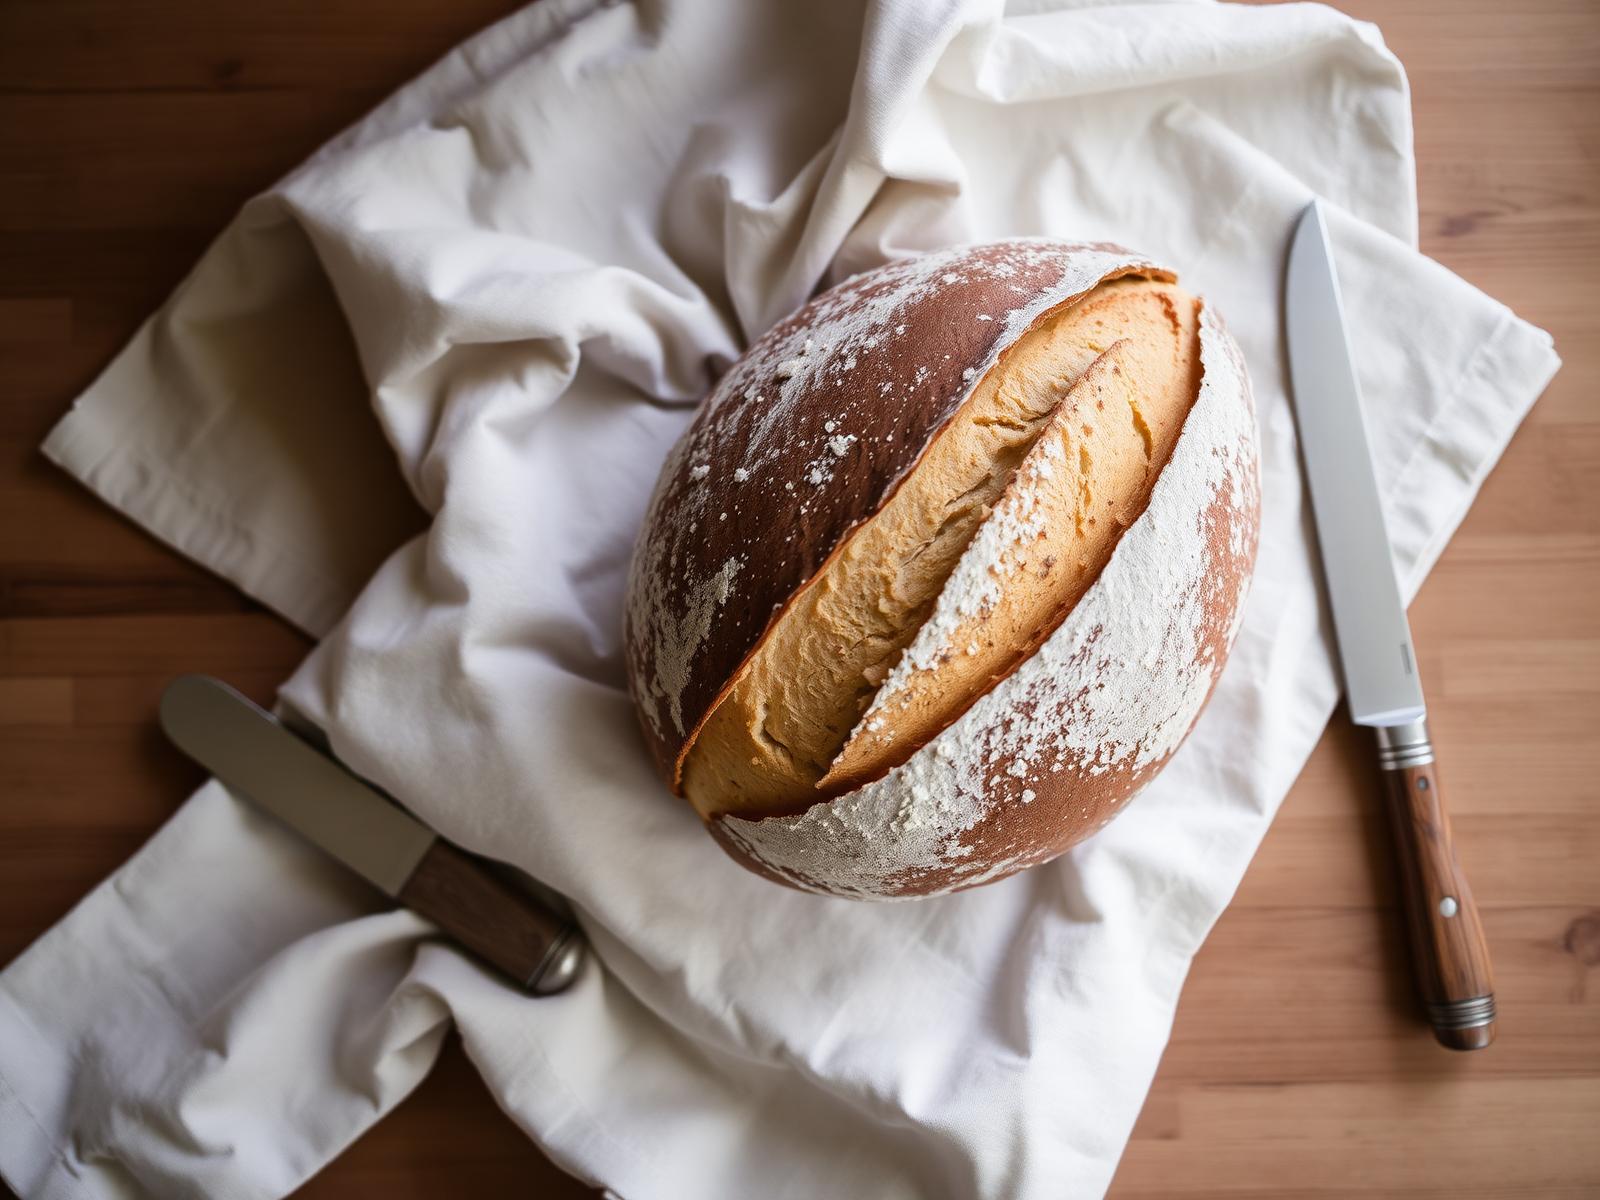
Turn the cold dough out onto a square of baking parchment. Using a sharp blade or a clean craft knife, make one confident slash about 1cm deep across the top, holding the blade at a slight angle. That score gives the loaf a controlled place to burst and rise, its "oven spring", instead of tearing at a weak spot.
Lift the loaf on its parchment into the hot pot, put the lid on and bake for 30 minutes. The trapped steam keeps the crust soft so the bread can spring up and open at the score. Then take the lid off, and if your oven runs hot you can drop it to around 210°C, and bake for a further 15 to 20 minutes until the crust is a deep, glossy brown (Shipton Mill). Tip it out and tap the base: it should sound hollow.
Troubleshooting: dense, flat or didn't rise
Most first-loaf problems trace back to one of three things: the starter, the fermentation or the cutting.
Dense and gummy inside. Usually an underripe starter or a loaf sliced too soon. Make sure your starter passes the float test before you mix, and always cool the loaf fully. Under-fermented bulk, where the dough never really grew, will also bake heavy.
Flat and spread out, no height. Often over-proved dough that ran out of strength, or not enough structure built during bulk. Do your stretch-and-folds, catch bulk before the dough goes slack and bubbly-collapsed, and bake straight from the cold fridge for a firmer, more scorable dough.
It barely rose at all. Almost always the starter. If it was not doubling and bubbling when you mixed, it simply did not have the power. Feed it a couple of times, keep it somewhere warmer, and wait for that reliable rise before baking. A cold kitchen also stalls things, so give a sluggish bulk more time rather than pressing on by the clock.
Your first loaf may not be a showstopper, and that is completely normal. Sourdough is a feel you build over a few bakes, and every loaf teaches you something about your own flour, your own starter and your own kitchen. Keep notes, change one thing at a time, and it will click.
Frequently asked questions
Sources
- Classic White Sourdough recipe , Shipton Mill
- Sourdough , Real Bread Campaign
- Classic Sourdough Bread , Doves Farm
Kit for this job (Ad)

Amazon Basics Digital kitchen scales with LCD display (with batteries), Black and Stainless Steel, BPA free, Weighs up to 11 pounds
Check price on Amazon →
Amazon Basics Cast Iron Casserole Dish with Lid, Enamelled, Round, Heavy-Duty, 4.1 L, Clay
Check price on Amazon →
ACCUWEIGHT 201 Digital Kitchen Scales with Tempered Glass Platform (Batteries included), Electronic Weighing Food Scale with Backlit LCD, Multifunction for Office School Home Baking Cooking, 5kg/11lb
Check price on Amazon →
Salter 1036 BKSSDR Digital Kitchen Scale – Cooking & Baking Scales for Food Weight, Stainless Steel Weighing Platform, 5KG Capacity, Tare Function, Large LCD Easy Read Display, Measure Liquids, Black
Check price on Amazon →We may earn a small commission, at no cost to you. We only list kit we'd use.
Written by
UK Homesteading Team
Editorial team
The UK Homesteading editorial team, offering UK-specific, evidence-led guidance on growing, keeping, preserving and the law.